Wednesday 26 August 2015

Making a jump list for your listview

In a previous post I was talking about making the contact list available in your app..

In this post, I will detail a simple way you can put in another list view that allows the user to jump quickly to a contact.


First the XML
<Page xmlns="http://www.nativescript.org/tns.xsd" shownModally="onShownModally" loaded="onLoaded" backgroundColor="transparent" xmlns:imageButton="helpers/buttonhelper">
  <GridLayout columns="*" rows="auto,*" width="320" height="500" cssClass="popup">
    <GridLayout columns="auto,*" rows="auto" cssClass="popuptitle" row="0" col="0">
      <Image src="{{image}}" cssClass="iconwhite" col="0"/>
      <Label text="{{title}}"  textWrap="true" col="1"/>
    </GridLayout>
    <StackLayout  row="1" col="0" cssClass="popupouter">
      <GridLayout columns="*,30" rows="auto,*,auto,auto,auto" cssClass="popupinner">
        <SearchBar text="{{search}}" row="0" col="0" colSpan="2" visibility="{{searchVisibility}}"/>
        <ListView row="1" col="0" items="{{values}}" id="listView" marginBottom="5">
        </ListView>
        <ListView row="1" col="1" items="{{letters}}" id="listViewLetters" marginBottom="5" cssClass="itembreak">
        </ListView>
        <Label text="{{name}}" row="2" col="0" colSpan="2" cssClass="itembreak" textWrap="true"/>
        <Label text="{{key}}" row="3" col="0" colSpan="2" cssClass="itemtitle" textWrap="true"/>
        <StackLayout orientation="horizontal" horizontalAlignment="center" row="4" col="0" colSpan="2">
          <imageButton:ImageButton textPadded="{{languageData.OK}}" tap="{{ok}}" icon="tick"/>
          <imageButton:ImageButton textPadded="{{languageData.Cancel}}"  tap="{{cancel}}" icon="cross"/>
        </StackLayout>
      </GridLayout>
    </StackLayout>
  </GridLayout>
</Page>

Then relevant sections of the code.


export interface IKeyLetter {
    letter: string;
    index: number;
}

var listLettersObservable: observableArray.ObservableArray<IKeyLetter> = new observableArray.ObservableArray<IKeyLetter>();

....
....
....

 // loop through list of contacts and make up list of first letters

    updateKeys() {
        listLettersObservable.splice(0);
        var observableKeys: Array<IKeyLetter> = [];
        var firstLetter = "";
        for (var i = 0, imax = listOptionsObservable.length; i < imax; i++) {
            var listOption = listOptionsObservable.getItem(i);
            var letter = listOption.contact.name.substr(0, 1).toUpperCase();
            if (letter != firstLetter) {
                observableKeys.push({ letter: letter, index: i });
                firstLetter = letter;
            }
        }
        listLettersObservable.push(observableKeys);
    }

....
....
....

 // Add label with letter to listview

        listViewLetters.on(listview.ListView.itemLoadingEvent,(args: listview.ItemEventData) => {
            var observableKey = listLettersObservable.getItem(args.index);
            var labelAdd = new label.Label();
            labelAdd.text = observableKey.letter;
            args.view = labelAdd;
        });

        // when letter tapped, scroll other list to item required

        listViewLetters.on(listview.ListView.itemTapEvent,(args: listview.ItemEventData) => {
            var keyLetter = listLettersObservable.getItem(args.index);

            if (platform.device.os == platform.platformNames.android) {
                this.listView.android.setSelection(keyLetter.index);
            }

            if (platform.device.os == platform.platformNames.ios) {
                var indexPath = new NSIndexPath(keyLetter.index);
                this.listView.ios.scrollToRowAtIndexPathAtScrollPositionAnimated(indexPath, UITableViewScrollPosition.UITableViewScrollPositionTop, true);
            }
        });

Friday 21 August 2015

Making a simple animated startup screen in nativescript

The app I am currently working is a database of about 1000 exercises for people with injuries and disabilities.

I wanted to have a start screen where the user could pick the language they want the app to run in and display some example exercises.

As the screen dimensions could be anything, I wrote some code to layout images to fit the entire screen using the absolute layout.

On top of this, I added the title banner and then I added a timer to randomly swap the location of two images every 200 milliseconds.

An example can be seen below.


If you wanted to, you could make the images move positions, rather than just swap positions using the new animation framework coming in version 1.3. See another example here.

XML

<Page xmlns="http://www.nativescript.org/tns.xsd" loaded="pageLoaded">
  <GridLayout columns="*" rows="*,auto" cssClass="page">
    <AbsoluteLayout row="0" column="0" id="absoluteLayout"/>
    <Image src="{{image}}" row="0" column="0" verticalAlignment="center"/>
    <GridLayout cssClass="footer" row="1" column="0" rows="auto" columns="50,*,50">
      <Image src="{{flag}}" cssClass="flagimage" col="0" row="0"/>
      <Label text="{{lang}}" tap="{{goDefault}}" col="1" row="0" textAlignment="left"/>
      <Image src="~/res/icons/white/ellipsis_white.png" cssClass="iconwhitesmall" tap="{{goOther}}" row="0" col="2"/>
    </GridLayout>
  </GridLayout>
</Page>

Page code

import observable = require("data/observable");
import pages = require("ui/page");
import model = require("./intro-view-model");
import absoluteLayout = require("ui/layouts/absolute-layout");

export function pageLoaded(args: observable.EventData) {
    var page = <pages.Page>args.object;
    page.bindingContext = model.viewModel;
    model.viewModel.placeImages(<absoluteLayout.AbsoluteLayout>page.getViewById("absoluteLayout"));
}

Model code

/* tslint:disable:use-strict triple-equals max-line-length one-line */

import observableHelper = require("../../helpers/observablehelper");
import applicationSettingsHelper = require("../../helpers/applicationsettingshelper");
import languageOption = require("../../res/data/languageoption");
import frames = require("ui/frame");
import recordDevice = require("../../helpers/recorddevice");
import absoluteLayout = require("ui/layouts/absolute-layout");
import platform = require("platform");
import image = require("ui/image");

var languageOptions: Array<languageOption.LanguageOption> = languageOption.data();

enum fields { image, lang, flag };

interface IPosition {
    left: number;
    top: number;
}

export class Model extends observableHelper.BaseModel<fields> {
    constructor() {
        super(fields);

        this.setValue(fields.image, "~/res/banner/banner.png");
        var languageChosen = applicationSettingsHelper.getLanguage();

        this.setValue(fields.lang, languageChosen);

        var flag = "";
        for (var i = 0, imax = languageOptions.length; i < imax; i++) {
            if (languageOptions[i].Lang == languageChosen) {
                flag = "~/res/flags/" + languageOptions[i].Flag.toLowerCase() + ".png";
                break;
            }
        }

        this.setValue(fields.flag, flag);

        recordDevice.recordDevice();
    }

    // scaling for images

    scale = 1;

    // image store

    imagesArray: Array<image.Image> = [];

    // determine screen dimensions and place images in absolute layout to fill the entire screen
    // then set the images source and then randomly swap two image locations every 200 milliseconds

    placeImages(layout: absoluteLayout.AbsoluteLayout) {
        var deviceWidth = platform.screen.mainScreen.widthPixels / platform.screen.mainScreen.scale,
            deviceHeight = platform.screen.mainScreen.heightPixels / platform.screen.mainScreen.scale,
            doExit = false,
            leftPos = 0,
            topPos = 0,
            imageHeight = 49 * this.scale,
            imageWidth = 40 * this.scale;

        // add images until the screen is completely full

        while (!doExit) {
            var imageAdd = new image.Image();
            imageAdd.width = imageWidth;
            imageAdd.height = imageHeight;
            absoluteLayout.AbsoluteLayout.setLeft(imageAdd, leftPos);
            absoluteLayout.AbsoluteLayout.setTop(imageAdd, topPos);
            layout.addChild(imageAdd);

            leftPos = leftPos + imageWidth + 2;

            if (leftPos > deviceWidth) {
                topPos = topPos + imageHeight + 2;
                leftPos = 0;
            }

            if (topPos > deviceHeight) {
                doExit = true;
            }

            this.imagesArray.push(imageAdd);
        }

        // set images

        this.setImages();

        // swap images on timer

        setTimeout(() => {
            this.setPositions();
        }, 200);
    }

    // Randomly pick two images and swap their locations

    setPositions() {

        // Pick two images randomly

        var oldPosition = Math.round(Math.random() * (this.imagesArray.length - 1));
        var newPosition = Math.round(Math.random() * (this.imagesArray.length - 1));

        // swap Locations

        var imageAdd = this.imagesArray[oldPosition];
        var imageAddPos = { left: absoluteLayout.AbsoluteLayout.getLeft(imageAdd), top: absoluteLayout.AbsoluteLayout.getTop(imageAdd) };

        var imageAdd2 = this.imagesArray[newPosition];
        var imageAdd2Pos = { left: absoluteLayout.AbsoluteLayout.getLeft(imageAdd2), top: absoluteLayout.AbsoluteLayout.getTop(imageAdd2) };

        absoluteLayout.AbsoluteLayout.setLeft(imageAdd, imageAdd2Pos.left);
        absoluteLayout.AbsoluteLayout.setTop(imageAdd, imageAdd2Pos.top);

        absoluteLayout.AbsoluteLayout.setLeft(imageAdd2, imageAddPos.left);
        absoluteLayout.AbsoluteLayout.setTop(imageAdd2, imageAddPos.top);

        setTimeout(() => {
            this.setPositions();
        }, 200);
    }

    // loop through images and set the image source, 90 "interesting" images to pick from

    setImages() {
        var imageCounter = 0;

        for (var i = 0, imax = this.imagesArray.length; i < imax; i++) {
            if (imageCounter == 90) {
                imageCounter = 1;
            }
            else {
                imageCounter = imageCounter + 1;
            }

            this.imagesArray[i].src = "~/res/banner/" + imageCounter + ".jpg";
        }
    }

    goDefault() {
        frames.topmost().navigate({
            moduleName: "./views/main/main-page"
        });
    }

    goOther() {
        frames.topmost().navigate({
            moduleName: "./views/language/language-page"
        });
    }
}

export var viewModel = new Model();

Saturday 15 August 2015

Using nativescript push notifications from an ASP NET perspective

Nativescript added push notification support in version 1.2. I decided to try using this for my android app, but found some of the instructions a bit vague, so I thought I would add some notes to help others who are trying to use it. First of all, the details on how to install it can be found here.

One thing I found, is that getting the token from the console when using node js can be quite frustrating as there is a lot of other stuff coming through from the phone, so I would recommend installing another plugin nativescript clipboard as well, and then using this to store the token so you can paste it into an email and email it to yourself while testing.

Below is my amended code from the hello world project.

var __extends = this.__extends || function (d, b) {
    for (var p in b) if (b.hasOwnProperty(p)) d[p] = b[p];
    function __() { this.constructor = d; }
    __.prototype = b.prototype;
    d.prototype = new __();
};
var observable = require("data/observable");
var HelloWorldModel = (function (_super) {
    __extends(HelloWorldModel, _super);
    function HelloWorldModel() {
        _super.call(this);
        this.counter = 42;
        this.set("message", this.counter + " taps left");

        var pushPlugin = require("nativescript-push-notifications");
        var clipboard = require("nativescript-clipboard");
        var self = this;
        var settings =
        {
            senderID: 'YOUR GOOGLE ID'
        };

        pushPlugin.register(settings,
               // Success callback
               function (token) {
                   clipboard.setText(token);
                   alert('Device registered successfully ' + token);
               },
               // Error Callback
               function (error) {
                   alert(error.message);
               }
           );

        pushPlugin.onMessageReceived(function callback(data) {
            alert(JSON.stringify(data));
        });

        pushPlugin.onTokenRefresh(function (token) {
            alert(token);
        });
    }
    HelloWorldModel.prototype.tapAction = function () {
        this.counter--;
        if (this.counter <= 0) {
            this.set("message", "Hoorraaay! You unlocked the NativeScript clicker achievement!");
        }
        else {
            this.set("message", this.counter + " taps left");
        }
    };
    return HelloWorldModel;
})(observable.Observable);
exports.HelloWorldModel = HelloWorldModel;
exports.mainViewModel = new HelloWorldModel();

So what exactly is your google id?

You need to create an account and logon to Google Developer Console.

Create a project and click on the overview option. The project id appears at the top of the screen as "Project Number". It also appears in the url after https://console.developers.google.com/project/.

You also need to go to the APIs section and give yourself access to "Google Cloud Messaging for Android".

Then goto the credentials section and click "Add Credentials" and create a server key. Copy the API key, you will need this later.

The next step is to write the code for sending the messages to the devices. How to do this is outlined here.

It details message formats. If however, you are using ASP NET for your server technology, I include my code here, so you can reuse it.
using Newtonsoft.Json;
using System;
using System.Collections.Generic;
using System.IO;
using System.Net;
using System.Text;
using System.Drawing;

public static class AndroidGCMPushNotification
{
    #region Constants

    const string AuthorizationKey = "YOUR AUTHORIZATION KEY";
    const string SenderId = "YOUR GOOGLE PROJECT ID";

    #endregion

    #region Public Methods

    public class MessageToSend
    {
        public string Title { set; get; }  // Title of message
        public string Message { set; get; } // Message Countent
        public int? MessageCount { set; get; }  // Number to show up in message
        public long NotId { set; get; } // Notification Id - If set to zero, it makes one randomly
        public string Sound { set; get; } // Sound to play
        public Color? Color { set; get; } // Color of Notification
        public string Icon { set; get; } // Icon for Notification
    }

    /// 
    /// Send message to google servers in JSON format
    /// 
    /// Tokens generated from Nativescript code
    /// Message to send
    /// 


    public static Response SendNotificationJSON(string[] deviceIds, MessageToSend messageToSend)
    {
        var webRequest = GetWebRequest(true);

        var pushNotification = new PushNotification();
        pushNotification.registration_ids = deviceIds;

        // Data

        pushNotification.data = new Dictionary();
        pushNotification.data.Add("title", messageToSend.Title);
        pushNotification.data.Add("message", messageToSend.Message);
        pushNotification.data.Add("notId", messageToSend.NotId.ToString());
        if (messageToSend.MessageCount.HasValue)
        {
            pushNotification.data.Add("msgcnt", messageToSend.MessageCount.ToString());
        }
        if (!String.IsNullOrEmpty(messageToSend.Sound))
        {
            pushNotification.data.Add("sound", messageToSend.Sound);
        }
        if (messageToSend.Color.HasValue)
        {
            pushNotification.data.Add("color", ColorTranslator.ToHtml(messageToSend.Color.Value));
        }
        if (!String.IsNullOrEmpty(messageToSend.Icon))
        {
            pushNotification.data.Add("smallIcon", messageToSend.Icon);
            pushNotification.data.Add("largeIcon", messageToSend.Icon);
        }
        pushNotification.data.Add("time", System.DateTime.Now.ToString()); // This will not be read by nativescript

        var postData = JsonConvert.SerializeObject(pushNotification, Formatting.None, new JsonSerializerSettings { NullValueHandling = NullValueHandling.Ignore }).Replace("\"messageOption\":", "");

        return GetWebResponse(webRequest, postData);
    }

    #endregion

    #region Private Methods

    /// 
    /// Builds the web request for url encoded or JSON format
    /// 
    /// indicates JSON is required
    /// Web request

    private static WebRequest GetWebRequest(bool json)
    {
        WebRequest webRequest;
        webRequest = WebRequest.Create("https://android.googleapis.com/gcm/send");
        webRequest.Method = "post";
        webRequest.ContentType = json ? "application/json" : "application/x-www-form-urlencoded;charset=UTF-8";
        webRequest.Headers.Add(string.Format("Authorization: key={0}", AuthorizationKey));
        webRequest.Headers.Add(string.Format("Sender: id={0}", SenderId));

        return webRequest;
    }

    /// 
    /// Posts data and gets response from server
    /// 
    /// Web request to post
    /// Web request body
    /// 

    private static Response GetWebResponse(WebRequest webRequest, string postData)
    {
        Byte[] byteArray = Encoding.UTF8.GetBytes(postData);
        webRequest.ContentLength = byteArray.Length;

        Stream dataStream = webRequest.GetRequestStream();
        dataStream.Write(byteArray, 0, byteArray.Length);
        dataStream.Close();

        WebResponse webResponse = webRequest.GetResponse();

        dataStream = webResponse.GetResponseStream();

        StreamReader tReader = new StreamReader(dataStream);

        String sResponseFromServer = tReader.ReadToEnd();

        tReader.Close();
        dataStream.Close();
        webResponse.Close();

        return JsonConvert.DeserializeObject<Response>(sResponseFromServer);
    }

    #endregion

    #region Push Notification Classes for JSON serialization

    // Message class for serialization taken from here
    // https://developers.google.com/cloud-messaging/server-ref#table1

    private class PushNotification
    {
        public string[] registration_ids;
        public Notification notification; // Not used in nativescript
        public Dictionary<string, string> data;
        public PushNotificationOption messageOption;
    }

    private class PushNotificationOption
    {
        public PushNotificationOption()
        {
            content_available = true;
            delay_while_idle = false;
            time_to_live = 4;
            dry_run = false;
        }

        public string collapse_key;
        public string priority;
        public bool? content_available;
        public bool? delay_while_idle;
        public int? time_to_live;
        public string restricted_package_name;
        public bool? dry_run;

    }

    private class Notification
    {
        public Notification()
        {
            icon = "ic_launcher";
        }
        public string title;
        public string body;
        public string icon; // Android
        public string badge; // IOS
        public string tag; // Android
        public string color; // Android
        public string click_action;
    }

    public class ResponseResult
    {
        public string message_id { set; get; }
        public string registration_id { set; get; }
        public string error { set; get; }

    }

    public class Response
    {
        public long multicast_id { set; get; }
        public int success { set; get; }
        public int failure { set; get; }
        public int canonical_ids { set; get; }
        public ResponseResult[] results { set; get; }

    }

    #endregion
}
Run up your android app, paste the token from the clipboard and pass it into the method as a device id.

AndroidGCMPushNotification.SendNotificationJSON(string[] deviceIds, MessageToSend messageToSend)

With the magic of nativescript, you can see your push notification come through, an example is shown below.


See the MessageToSend class for things you can control. This includes :
  1. Title of message
  2. Message
  3. Unique Notification Id
  4. Message Count - see number on the right under the message time
  5. Sound - custom sound to play - you need to put the custom sound in the \platforms\android\res\raw folder. For example a mp3 or wav file. The sound passed in does not have to include the file extension
  6. Color - color of notification
  7. Icon - icon of notification - put image file in \platforms\android\res\drawable folder.
See here for Telerik's android implementation of the notification.

Hopefully this may help someone else get started at least.

Sunday 9 August 2015

Making an image button in nativescript

In the latest release on nativescript, background-image, background-position, background-repeat, background-size, border-radius styles were added.

So I decided to make the buttons in my app a bit more visually interesting. I was inspired by a tweet from John Bristowe.

This is how my buttons originally looked, simple black squares.


Css for this is as below.

.button {
    horizontal-align: center;
    margin: 5;
    color: white;
    background-color: black;
}

I wasn't really happy with the spacing for the cancel button. I tried to use padding, but this isn't supported in buttons because of it being just simple text, not an object which can have padding.

So I eventually ended up with this.

.buttonImage {
    horizontal-align: center;
    margin: 5;
    color: white;
    background-color: black;
    border-radius:10;
    background-repeat : no-repeat;
    background-position : left center;
}

I also wrote a custom extension to the button class.

import button = require("ui/button");

export class ImageButton extends button.Button {
    private _icon: string;

    // icon

    public get icon(): string {
        return this._icon;
    }

    public set icon(value: string) {
        this._icon = value;

        this.cssClass = "buttonImage";
        this.backgroundImage = "~/res/icons/white/" + value + "_white.png";
    }

    // text override with spacing

    public get textPadded(): string {
        return this._getValue(button.Button.textProperty);
    }

    public set textPadded(value: string) {
        this._setValue(button.Button.textProperty, "       " + value + "  ");
    }
}

It adds in padding before and after the text, to make it fit the button and avoid overlapping the image. This depends on the font and image you use obviously. Ideally it should be done with padding, but this will not work unfortunately. You can pass in the icon name you want to use in XML.

You can declare widgets at the top of your page like this.

<Page xmlns="http://www.nativescript.org/tns.xsd" xmlns:check="helpers/checkboximage">

You can then reference them in XML layout.

<imageButton:ImageButton textPadded="{{languageData.OK}}" tap="{{ok}}" icon="tick"/>

So the end result is I can now have buttons like below. I think this looks more visually appealing.

Saturday 8 August 2015

Making a replacement checkbox/radiobutton in nativescript

Continuing the implementation of my nativescript program and given I saw people were asking for checkbox and radio buttons on Github, I thought I would post my checkbox/radio button control.

You can see it being used here in the search screen.


You can make your own widgets using dependencyObservable properties.

My checkbox/radio button widget extends the image control. It displays a different image if it checked/unchecked and also different images if it is a radio/checkbox widget.

When it is displaying a radio, it prevents unchecking if you tap the checked widget.

Logic for having only one selected radio button needs to be done in your attached model.

I figured out how to do this by looking at how they did it in the source code for the switch widget as well in the documentation. Being open source code it really helps in the understanding.

You can declare widgets at the top of your page like this.

<Page xmlns="http://www.nativescript.org/tns.xsd" xmlns:check="helpers/checkboximage">

You can then reference them in XML layout.

<check:CheckboxImageXml row="2" col="1" single="true" checked="{{imageAlignLeft}}"/>

Code is as per below.

import image = require("ui/image");
import gestures = require("ui/gestures");
import observable = require("data/observable");
import cssClassHelper = require("./cssClassHelper");
import dependencyObservable = require("ui/core/dependency-observable");
import proxy = require("ui/core/proxy");

function onCheckedPropertyChanged(data: dependencyObservable.PropertyChangeData) {
    var checkBoxOImageXml = <CheckboxImageXml> data.object;
    checkBoxOImageXml.setFields();
}

function onSinglePropertyChanged(data: dependencyObservable.PropertyChangeData) {
    var checkBoxOImageXml = <CheckboxImageXml> data.object;
    checkBoxOImageXml.setFields();
}

export class CheckboxImageXml extends image.Image {

    public static singleProperty = new dependencyObservable.Property(
        "single",
        "CheckboxImageXml",
        new proxy.PropertyMetadata(
            undefined,
            dependencyObservable.PropertyMetadataSettings.None,
            onSinglePropertyChanged
            )
        );

    public static checkedProperty = new dependencyObservable.Property(
        "checked",
        "CheckboxImageXml",
        new proxy.PropertyMetadata(
            undefined,
            dependencyObservable.PropertyMetadataSettings.None,
            onCheckedPropertyChanged
            )
        );

    constructor() {
        super();

        this.cssClass = cssClassHelper.iconblack;
        this.setFields();
        this.style.margin = "2";

        this.observe(gestures.GestureTypes.tap,(args: gestures.GestureEventData) => {
            if (!this.single && this.checked) {
                return;
            }
            this.checked = !this.checked;
        });
    }


    public set checked(value: boolean) {
        this._setValue(CheckboxImageXml.checkedProperty, value);
    }

    public get checked() {
        return this._getValue(CheckboxImageXml.checkedProperty);
    }

    public set single(value: boolean) {
        this._setValue(CheckboxImageXml.singleProperty, value);
    }

    public get single() {
        return this._getValue(CheckboxImageXml.singleProperty);
    }

    public setFields() {
        var imageUrl = "~/res/icons/black/" + (this.single ? "checkbox" : "radio") + (this.checked ? "on" : "off") + "_black.png";
        this.src = imageUrl;
    }

}
Javascript code added on request on 25/10/2015.

/* tslint:disable:use-strict triple-equals max-line-length one-line */
var __extends = this.__extends || function (d, b) {
    for (var p in b) if (b.hasOwnProperty(p)) d[p] = b[p];
    function __() { this.constructor = d; }
    __.prototype = b.prototype;
    d.prototype = new __();
};
var image = require("ui/image");
var gestures = require("ui/gestures");
var observable = require("data/observable");
var cssClassHelper = require("./cssClassHelper");
var dependencyObservable = require("ui/core/dependency-observable");
var proxy = require("ui/core/proxy");
function onCheckedPropertyChanged(data) {
    var checkBoxOImageXml = data.object;
    checkBoxOImageXml.setFields();
}
function onSinglePropertyChanged(data) {
    var checkBoxOImageXml = data.object;
    checkBoxOImageXml.setFields();
}
var CheckboxImageXml = (function (_super) {
    __extends(CheckboxImageXml, _super);
    function CheckboxImageXml() {
        var _this = this;
        _super.call(this);
        this.cssClass = cssClassHelper.iconblack;
        this.setFields();
        this.style.margin = "2";
        this.observe(gestures.GestureTypes.tap, function (args) {
            if (!_this.single && _this.checked) {
                return;
            }
            _this.checked = !_this.checked;
        });
    }
    Object.defineProperty(CheckboxImageXml.prototype, "checked", {
        get: function () {
            return this._getValue(CheckboxImageXml.checkedProperty);
        },
        set: function (value) {
            this._setValue(CheckboxImageXml.checkedProperty, value);
        },
        enumerable: true,
        configurable: true
    });
    Object.defineProperty(CheckboxImageXml.prototype, "single", {
        get: function () {
            return this._getValue(CheckboxImageXml.singleProperty);
        },
        set: function (value) {
            this._setValue(CheckboxImageXml.singleProperty, value);
        },
        enumerable: true,
        configurable: true
    });
    CheckboxImageXml.prototype.setFields = function () {
        var imageUrl = "~/res/icons/black/" + (this.single ? "checkbox" : "radio") + (this.checked ? "on" : "off") + "_black.png";
        this.src = imageUrl;
    };
    CheckboxImageXml.singleProperty = new dependencyObservable.Property("single", "CheckboxImageXml", new proxy.PropertyMetadata(undefined, dependencyObservable.PropertyMetadataSettings.None, onSinglePropertyChanged));
    CheckboxImageXml.checkedProperty = new dependencyObservable.Property("checked", "CheckboxImageXml", new proxy.PropertyMetadata(undefined, dependencyObservable.PropertyMetadataSettings.None, onCheckedPropertyChanged));
    return CheckboxImageXml;
})(image.Image);
exports.CheckboxImageXml = CheckboxImageXml;
var CheckboxImage = (function (_super) {
    __extends(CheckboxImage, _super);
    function CheckboxImage() {
        _super.apply(this, arguments);
    }
    CheckboxImage.prototype.initialize = function (single, field, model) {
        var _this = this;
        this.cssClass = cssClassHelper.iconblack;
        this._field = field;
        this._single = single;
        this._model = model;
        this.setFields();
        this.style.margin = "2";
        this.observe(gestures.GestureTypes.tap, function (args) {
            if (!_this._single && _this._model.get(field)) {
                return;
            }
            _this._model.set(field, !_this._model.get(field));
        });
        this._model.addEventListener(observable.Observable.propertyChangeEvent, function (data) {
            if (data.propertyName === _this._field) {
                _this.setFields();
            }
        });
    };
    Object.defineProperty(CheckboxImage.prototype, "model", {
        get: function () {
            return this._model;
        },
        set: function (value) {
            this._model = value;
            this.initialize(this._single, this._field, this._model);
        },
        enumerable: true,
        configurable: true
    });
    Object.defineProperty(CheckboxImage.prototype, "field", {
        get: function () {
            return this._field;
        },
        set: function (value) {
            this._field = value;
        },
        enumerable: true,
        configurable: true
    });
    Object.defineProperty(CheckboxImage.prototype, "single", {
        get: function () {
            return this._single;
        },
        set: function (value) {
            this._single = value;
        },
        enumerable: true,
        configurable: true
    });
    CheckboxImage.prototype.setFields = function () {
        var imageUrl = "~/res/icons/black/" + (this._single ? "checkbox" : "radio") + (this._model.get(this._field) ? "on" : "off") + "_black.png";
        this.src = imageUrl;
    };
    return CheckboxImage;
})(image.Image);
exports.CheckboxImage = CheckboxImage;

Making the contact list available in your app

Using nativescript, you can access the apis on your device. Today I will be posting screenshots and details on how you can do it on Android. IOS will be much the same, there are many posts found on google on how to do this.

Eventually I hope to post all the code on Github.

The app I am working on has the option for the user to email or sms booklets of exercises to their clients. Added a button next to the email address which the user can tap to access the phone's contacts.


Using a pageview in modal dialog mode, you can display all the contacts with email addresses, the user can do filter searchs and tap on the email address they wish to use. This then updates the email screen.


Similarly for the sms tab, added a button next to the phone number.


The user can enter a phone number from scratch (including the country code).


Alternatively they can pick a phone number straight from their contacts list.


The code for getting the android contacts is as below. I hope to be able to clean it up a bit in the future. I had some crash issues getting this working, it was a bit of a experimental exercise.

Edit : Forgot to mention, you also need to add
<uses-permission android:name="android.permission.READ_CONTACTS"> to your AndroidManifest file.

import application = require("application");

export interface IContact {
    id: string;
    name: string;
    phoneNumber: Array<IContactData>;
    email: Array<IContactData>;
}

export interface IContactData {
    data: string;
    dataType: string;
}

// converts number to english equivalent

function translateType(dataType: number) {
    var dataTypeTranslation = "??: ";
    switch (dataType) {
        case 1:
            dataTypeTranslation = "Home: ";
            break;
        case 3:
            dataTypeTranslation = "Work: ";
            break;
        case 2:
            dataTypeTranslation = "Mobile: ";
            break;
    }

    return dataTypeTranslation;
}

// returns list of contacts - android only, IOS to be added

export function getAndroidContacts(): Array<IContact> {


    var contacts: Array<IContact> = [];
    var contentResolver = application.android.context.getContentResolver();

    // get All email contacts and convert to javascript object
    // note if you do this in the same way as phone numbers, the program crashes without giving a useful error code

    var emailObject: Object = {};
    var emailCursor = contentResolver.query(android.provider.ContactsContract.CommonDataKinds.Email.CONTENT_URI,
        ["data1", "data2", "name_raw_contact_id"], null, null, null);

    if (emailCursor.getCount() > 0) {
        while (emailCursor.moveToNext()) {

            var id = emailCursor.getString(emailCursor.getColumnIndex("name_raw_contact_id"));
            var email = emailCursor.getString(emailCursor.getColumnIndex("data1"));
            var emailType = emailCursor.getInt(emailCursor.getColumnIndex("data2"));

            if (email != "undefined" && email != null) {
                var key = "E" + id;
                if (typeof emailObject[key] == "undefined") {
                    emailObject[key] = [];
                }
                emailObject[key].push({ data: email, dataType: translateType(emailType) });
            }
        }
    }
    emailCursor.close();

    // get contacts

    var cursor = contentResolver.query(android.provider.ContactsContract.Contacts.CONTENT_URI, ["name_raw_contact_id", "display_name", "has_phone_number"], null, null, null);
    if (cursor.getCount() > 0) {
        while (cursor.moveToNext()) {
            var contact: IContact =
                {
                    id: cursor.getString(cursor.getColumnIndex("name_raw_contact_id")),
                    name: cursor.getString(cursor.getColumnIndex("display_name")),
                    phoneNumber: [],
                    email: []
                };


            // get corresponding phone numbers

            if (parseInt(cursor.getString(cursor.getColumnIndex("has_phone_number")), 10) > 0) {
                var phoneCursor = contentResolver.query(android.provider.ContactsContract.CommonDataKinds.Phone.CONTENT_URI, ["data1", "data2"],
                    "contact_id = ?", [contact.id], null);
                if (phoneCursor.getCount() > 0) {
                    while (phoneCursor.moveToNext()) {
                        var phone = phoneCursor.getString(phoneCursor.getColumnIndex("data1"));
                        var phoneType = phoneCursor.getInt(phoneCursor.getColumnIndex("data2"));

                        if (phone != "undefined" && phone != null) {
                            contact.phoneNumber.push({ data: phone, dataType: translateType(phoneType) });
                        }
                    }
                }
                phoneCursor.close();
            }

            // get email

            
            var key = "E" + contact.id;
            if (typeof emailObject[key] != "undefined") {
                contact.email = emailObject[key];
            }

            // only return in it has an email or phone
            
            if (contact.phoneNumber.length > 0 || contact.email.length > 0) {
                contacts.push(contact);
            }
        }
    }
    cursor.close();

    return contacts;

}

Sunday 2 August 2015

A "real world" nativescript app.using the new Telerik Charting options.

I am in the process of writing a nativescript app to replace two seperate versions of our android and IOS offerings. It will be an extension to our website www.physiotherapyexercises.com, a website that allows people with disabilites to find exercises that are appropriate for them.

I am hoping to eventually open source this on github and get it on the telerik showcase page so people can see how powerful nativescript is and what you can do with it.

One of the new screens will allow us to see how the website is being used. The information is being tracked using google analytics.

The screen allows the user to select a date range, a country, region and a city to get information from.

The first tab shows a column chart of number of visits and new visits to the site each day, week or month.

Using the 'pallette entries' option for the chart, you can choose what color scheme to use, so I have matched up with series colors with the column headers in the table of data shown below it.
The country, region and city popups use my own custom implmentation of modal popup dialogs.
Other tabs display piecharts on operating system, browser used, screen resolution etc.
I have put in a more complicated legend using a grid layout control. At this stage I haven't got the color codes matching correctly by using the 'pallette options'. Will have to ask telerik what I am doing wrong.
Finally there is a summary page that shows what people are doing on the website.
Other screens for interest, the main screen where users' navigate from.
Logging onto the program.
Selecting exercises to do.
You can swap between a gallery view and more "text based" view. I am looking forward to using the new telerik listview control coming in September to improve this.
Choosing search criteria (using custom widget to do radio buttons and checkboxes).
A preview of what the exercises will look like before being output to word, pdf etc.
Choosing the output format
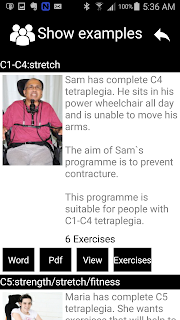
There are also "pre-built" exercises booklets that users can customize.
There is options to watch videos.
Details on who we are.
Change history using a listview and a custom bullet point widget.
Twitter feed with a custom hyperlink widget (highlights urls and makes them clickable just like in a browser).
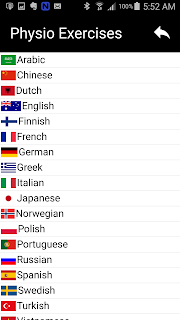
The program has been translated into a number of languages, so the user can choose what language the want when they start the app.
Users can save their booklets of exercises and edit them.
Editing allows you to change the text, add other information such as contact details and customize the booklets further.
Editing the text
The user can even take photos using the photo option built into the nativescript functionality.
I am hoping to have this complete and in the IOS/Android stores in september after the next telerik nativescript release.